There are a few possibilities on how to include a routeplanner in your page. First of all a short overview of the different parts.
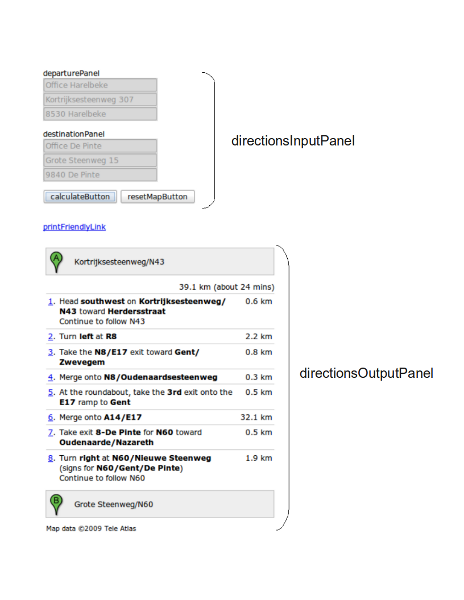
The code needed to create the page on this screenshot:
<div>
	<rd:departurePanel id="depPanel" title="departurePanel" />
	<rd:destinationPanel id="destPanel" title="destinationPanel" />
	<rd:calculateButton id="calcButton" value="calculateButton" />
	<rd:resetMapButton id="resetMapBtn" value="resetMapButton" /><br /><br />
	<rd:printFriendlyLink id="prFrLink" value="printFriendlyLink" />
</div>
<rd:directionsOutputPanel id="directionsOutput" />
This option has the highest customization level. You can position each panel where you like it to be.
For users who don't need this, we created also a directionsInputPanel and a directionsPanel. Please read on for more information about these two panels.
This panel includes the departurePanel, the destinationPanel, the calculateButton and the resetMapButton.
To achieve a result similar to the screenshot above, please use:
<div>
	<rd:directionsInputPanel id="directionsInputPnl" />
	<br /><br />
	<rd:printFriendlyLink id="prFrLink" value="printFriendlyLink" />
</div>
<rd:directionsOutputPanel id="directionsOutput" />
There is one more possibility to use: